STEP 1 of 7
Your brands
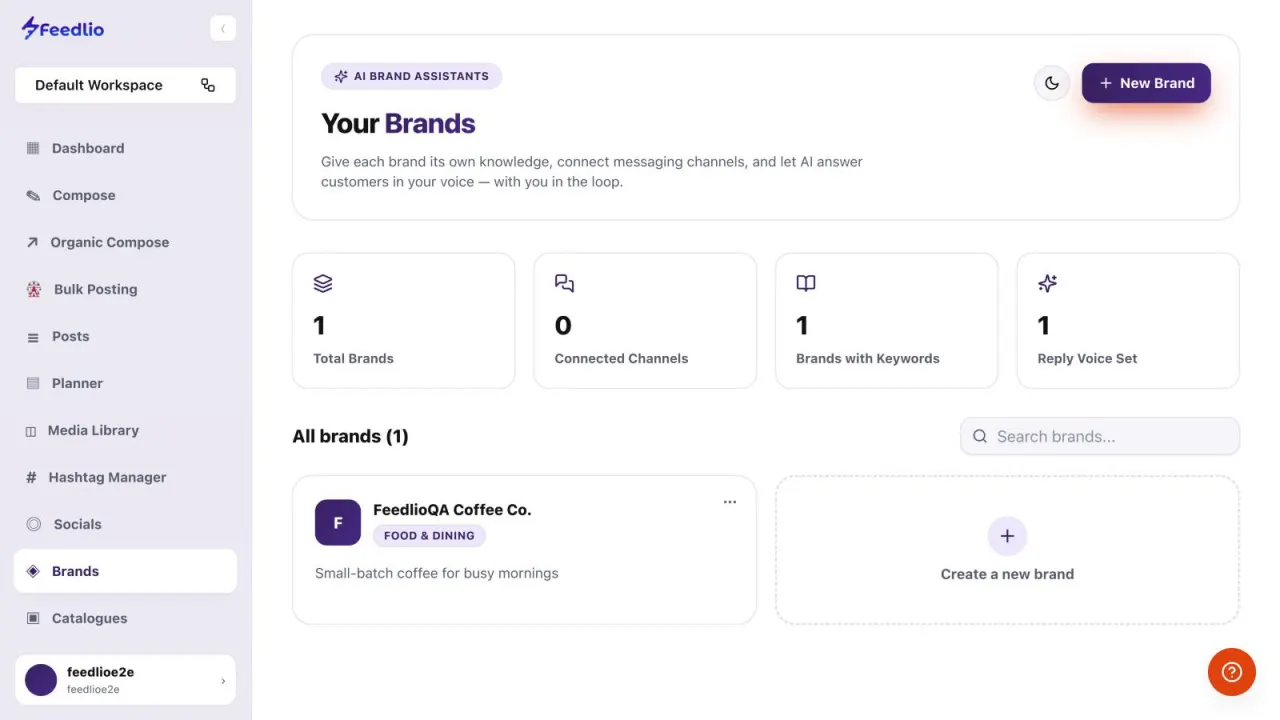
Click Brands in the left sidebar. The counters show Total Brands, Connected Channels, Brands with Keywords and brands with a Reply Voice Set.
feedlio.io/brandsClick to zoom
Create a brand with its own AI assistant. Set up its basics, reply voice and contact details so it can answer customers in your voice, with you in the loop.
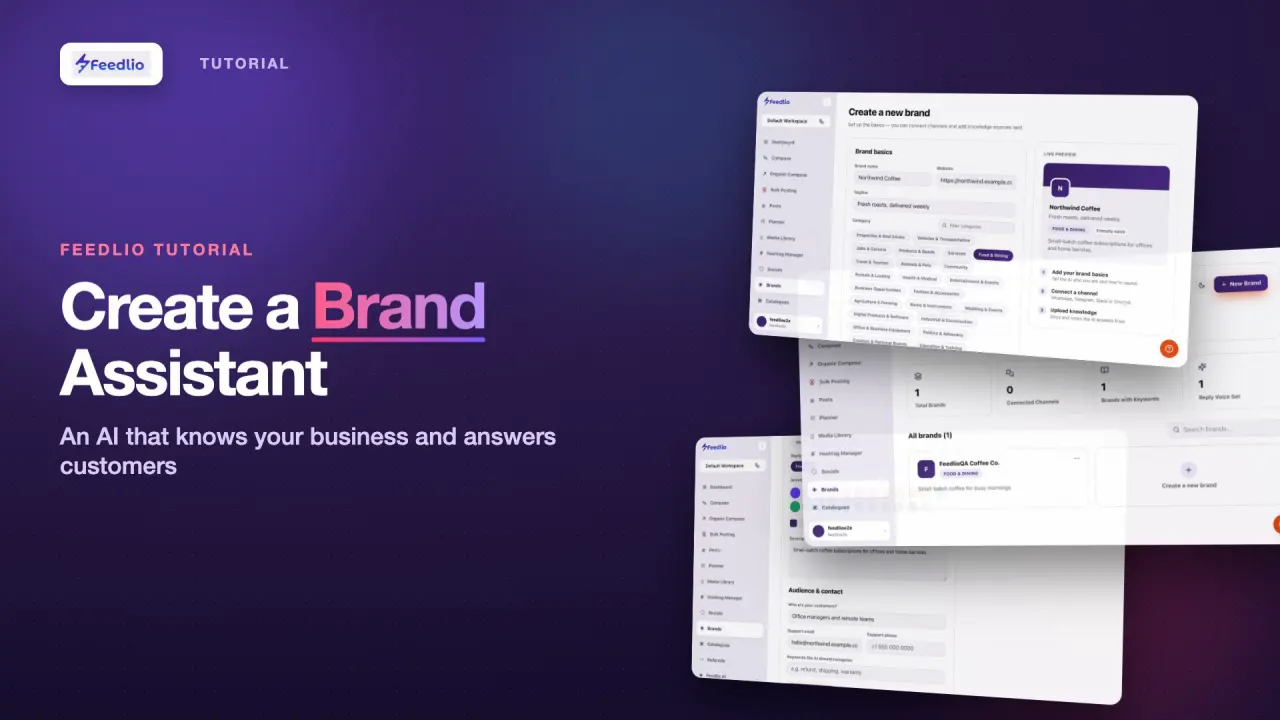 Video coming soon
Nothing to set up first. You can follow this guide straight away.
Follow along in the app. Tick each step off as you go.
Click Brands in the left sidebar. The counters show Total Brands, Connected Channels, Brands with Keywords and brands with a Reply Voice Set.
Click New Brand at the top, or the Create a new brand card under All brands.
12Under Brand basics, enter the Brand name, Website and a short Tagline that sums up what you do.
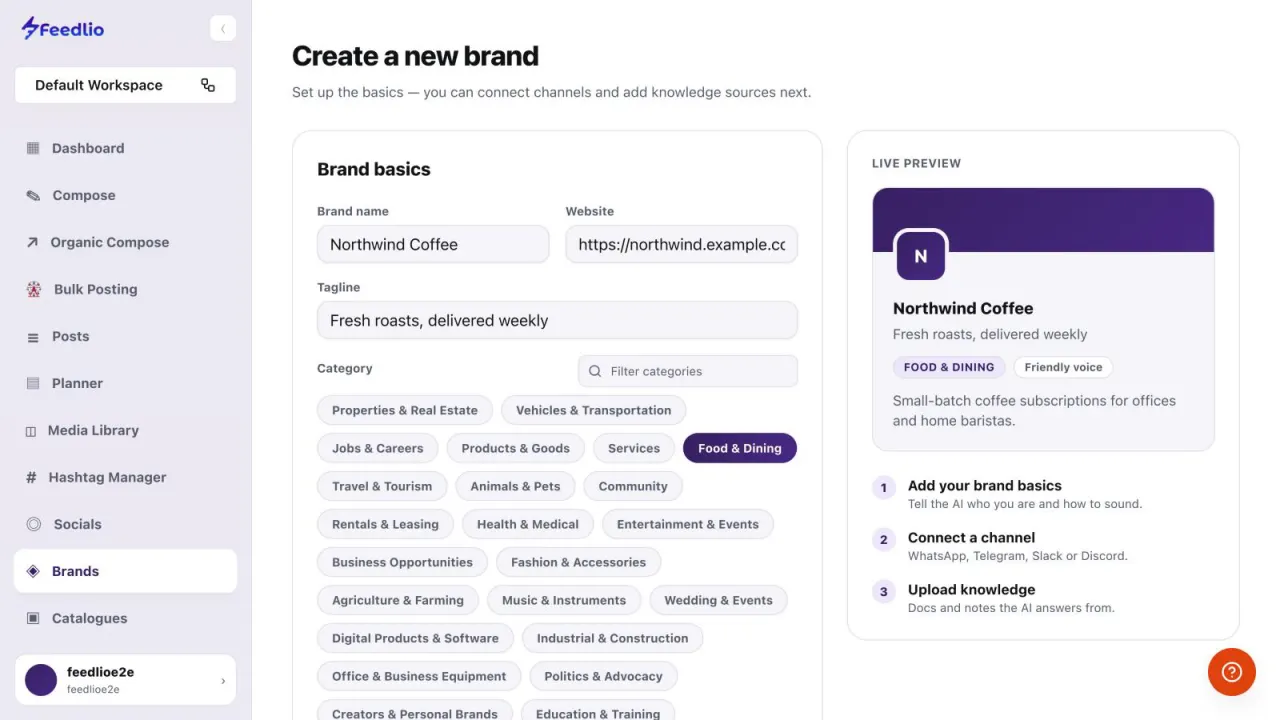
Under Category, choose the one that fits best. There are thirty, so type in Filter categories to find yours quickly.
The Live preview updates as you type. The checklist under it shows what comes next: add your brand basics, connect a channel, and upload knowledge.
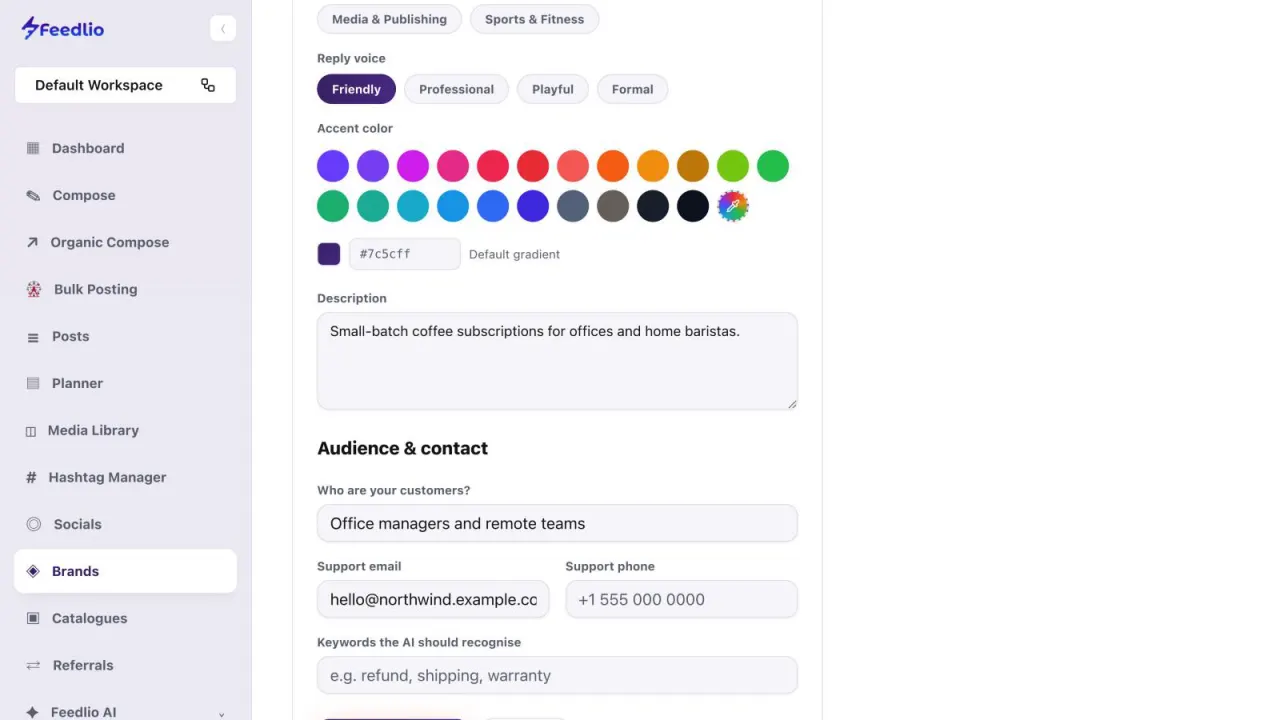
Pick the Reply voice the AI uses with customers. Choose an Accent color from the swatches or enter a hex code, then write a Description of what the brand does and who it's for.
 12
12Under Audience & contact, describe your customers in Who are your customers? and add a Support email and Support phone. List Keywords the AI should recognise, like refund or shipping, then click Create brand.
A new brand only knows its basics. Add knowledge and connect channels so it can answer real questions.
Click New Brand, add the name, website, tagline and category, pick a reply voice and colour, describe the brand, add audience and contact details, then create it.
Friendly, Professional, Playful or Formal. The AI uses this voice when it answers customers.
Thirty. Type in Filter categories to narrow the list.
They are words the AI should recognise in customer messages, like refund, shipping or warranty.
Follow the checklist in the live preview. Connect a messaging channel, then upload knowledge the AI can answer from.
0:00Feedlio Brand gives each of your brands its own AI assistant. It learns your business, connects to messaging channels, and answers customers in your voice, with you in the loop. Let's create one.
0:12Open Brands from the sidebar. The counters show how many brands you have, connected channels, and how many have keywords and a reply voice set up.
0:22Click New Brand, or the Create a new brand card, to get started.
0:27Enter the brand name, website, and a short tagline that captures what you do.
0:33Choose the category that fits best. There are thirty to pick from, and you can filter the list.
0:39The live preview updates as you type, and the checklist shows what's next: add your basics, connect a channel, and upload knowledge.
0:48Pick the reply voice the AI should use, friendly, professional, playful or formal, choose an accent colour, and describe what the brand does and who it's for.
0:59Finally, describe your customers, add a support email and phone, and list keywords the AI should recognise, like refund or shipping. Then click Create brand.
1:10Recap: click New Brand, add the name, website, tagline and category, pick a reply voice and colour, describe the brand, add audience and contact details, then create it.
1:22Your brand now has its own AI voice. Next, let's teach it with a knowledge base and connect messaging channels.