LearnOpen Feedlio
Esc
↑↓ to move↵ to openSearches every guide and step
Home›Feedlio AI›Campaign Builder
Guide 14 · Feedlio AI

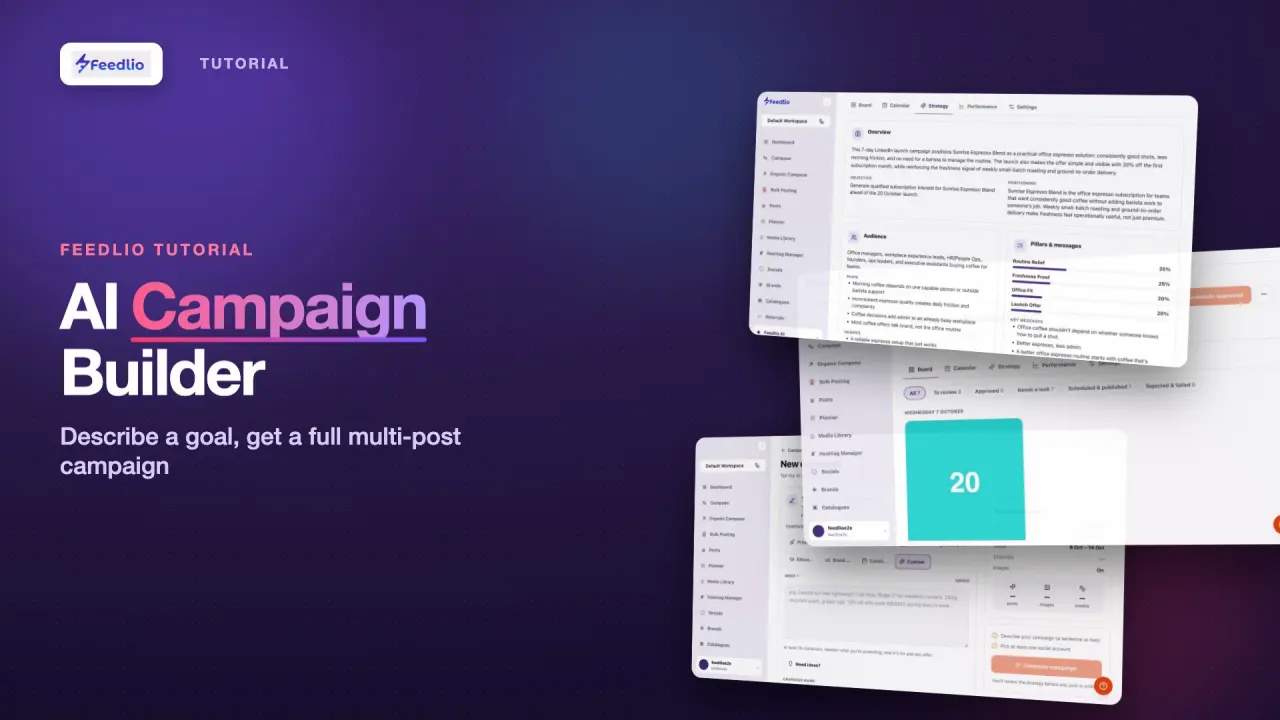
AI Campaign Builder

Turn one brief into a complete multi-post campaign. Set the goal, voice, channels and schedule, let the AI plan and write it, then approve the posts before they go live.

2:13 video4 min read9 stepsAll plans
AI Campaign Builder tutorial videoVideo coming soon

What you'll learn

  • Start a campaign from a template or from scratch
  • Write a brief the AI can turn into sharp posts
  • Set the voice, channels, dates and posting windows
  • Review the AI's strategy and approve posts on the Board

Step by step

Follow along in the app. Tick each step off as you go.

STEP 1 of 9

Start a campaign

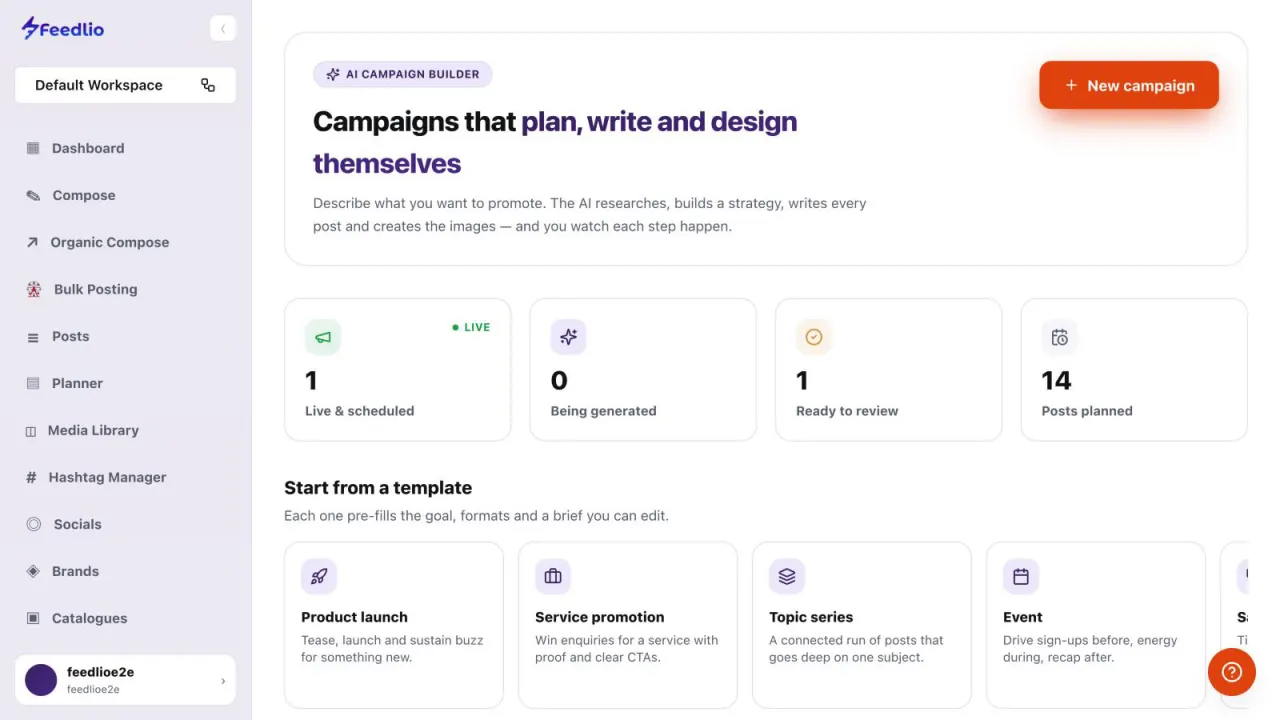
Open Feedlio AI → Campaign Builder. The counters show campaigns that are live and scheduled, being generated, ready to review, and the total posts planned. Click New campaign to start from scratch.

feedlio.io/campaign-builderClick to zoom
Screenshot: Start a campaign12
feedlio.io/campaign-builderClick to close
Screenshot: Start a campaign12
Step 1: Start a campaignEsc to close
STEP 2 of 9

Use a template

Pick a card under Start from a template to skip the blank page. Each template pre-fills the goal, formats and a brief you can edit.

  • Product launch & Service promotion
  • Topic series, Event, Sale
  • Educational, Brand awareness, Catalogue
feedlio.io/campaign-builderClick to zoom
Screenshot: Use a template
feedlio.io/campaign-builderClick to close
Screenshot: Use a template
Step 2: Use a templateEsc to close
STEP 3 of 9

All your campaigns

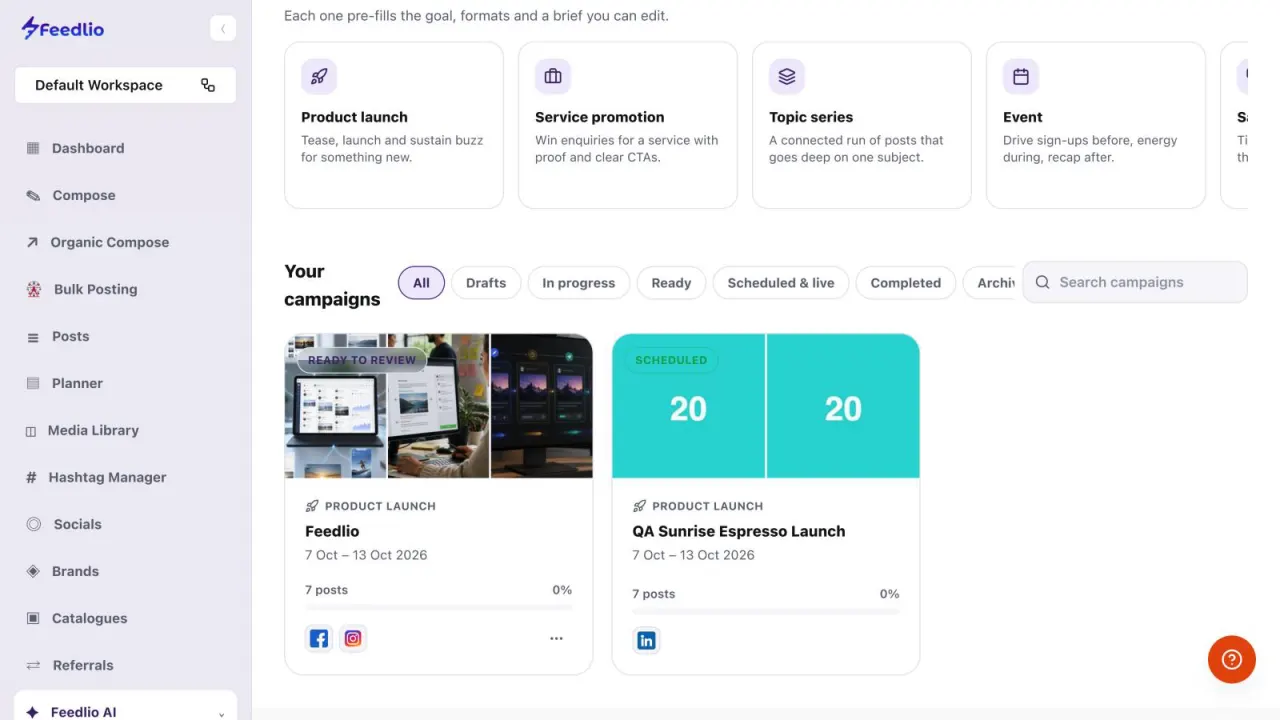
Under Your campaigns, filter by Drafts, In progress, Ready, Scheduled & live, Completed or Archived, or use Search campaigns to find one by name.

feedlio.io/campaign-builderClick to zoom
Screenshot: All your campaigns12
feedlio.io/campaign-builderClick to close
Screenshot: All your campaigns12
Step 3: All your campaignsEsc to close
STEP 4 of 9

Write the brief

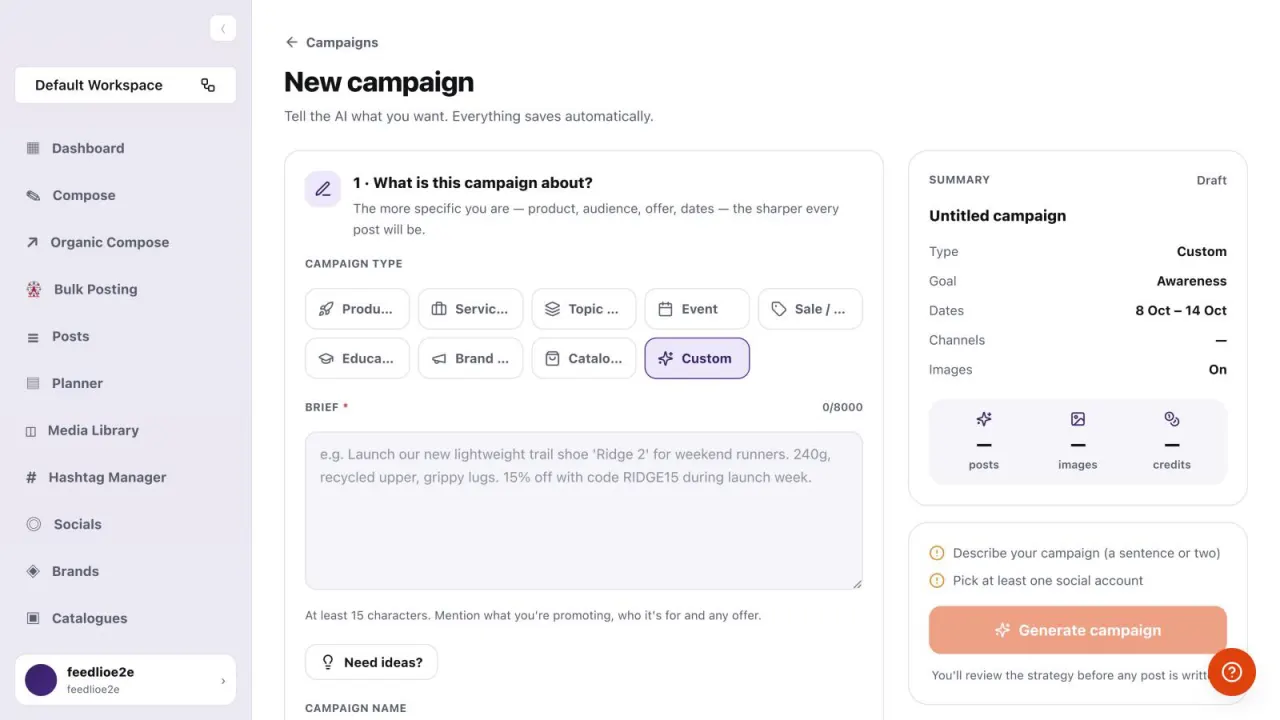
Choose a Campaign type, then write your Brief. Name the product, audience, offer and dates. The more specific you are, the sharper every post will be.

Everything saves automatically.

You can leave and come back to a draft any time. If you're stuck on the brief, click Need ideas?.

feedlio.io/campaign-builderClick to zoom
Screenshot: Write the brief12
feedlio.io/campaign-builderClick to close
Screenshot: Write the brief12
Step 4: Write the briefEsc to close
STEP 5 of 9

Voice & style

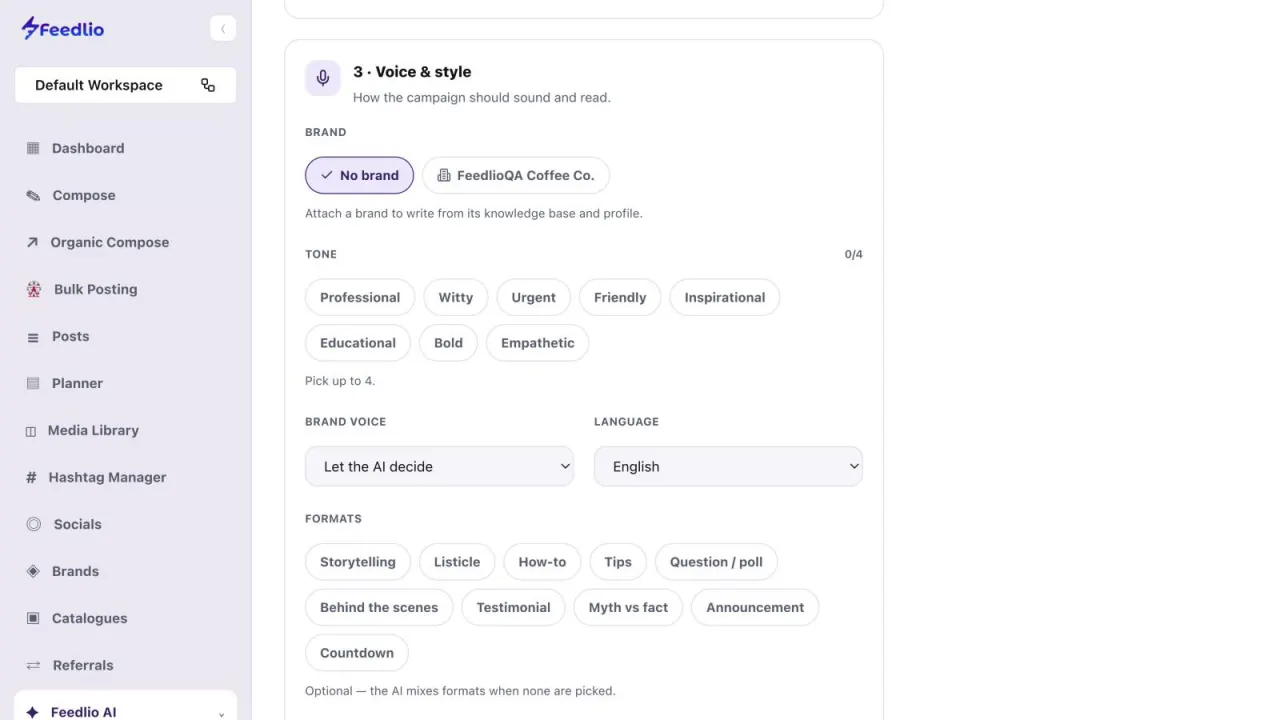
Under Brand, attach a brand so the AI writes from its knowledge base and profile, or keep No brand. Pick up to four tones, set Brand voice and Language, and choose the Formats you like.

If you pick no formats, the AI mixes them for you.

feedlio.io/campaign-builderClick to zoom
Screenshot: Voice & style123
feedlio.io/campaign-builderClick to close
Screenshot: Voice & style123
Step 5: Voice & styleEsc to close
STEP 6 of 9

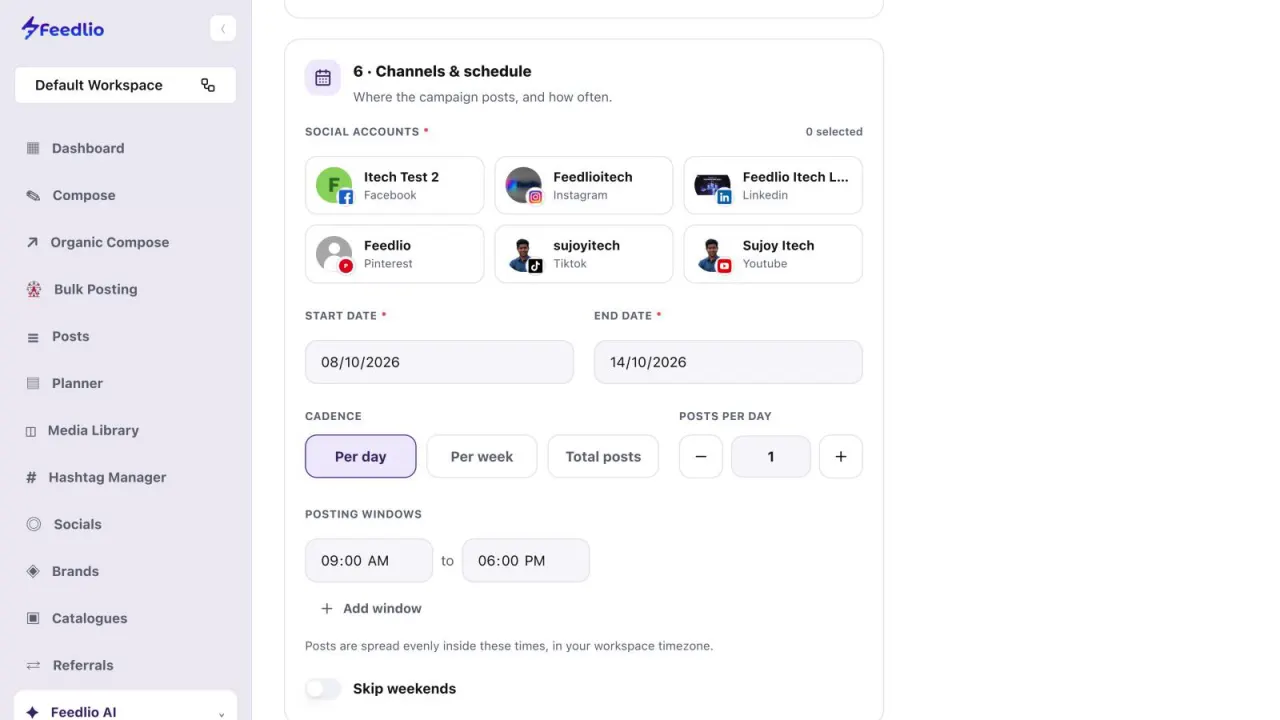
Channels & schedule

Select your Social accounts, then set the Start date and End date. Choose a Cadence and how many posts, then set Posting windows. Turn on Skip weekends to post on weekdays only.

Times use your workspace time zone.

Posts are spread evenly inside your posting windows. Click + Add window for more than one slot per day.

feedlio.io/campaign-builderClick to zoom
Screenshot: Channels & schedule123
feedlio.io/campaign-builderClick to close
Screenshot: Channels & schedule123
Step 6: Channels & scheduleEsc to close
STEP 7 of 9

Generate it

The Summary panel tracks posts, images and credits, and lists anything still missing. When it's complete, click Generate campaign. You review the strategy before any post is written.

feedlio.io/campaign-builderClick to zoom
Screenshot: Generate it12
feedlio.io/campaign-builderClick to close
Screenshot: Generate it12
Step 7: Generate itEsc to close
STEP 8 of 9

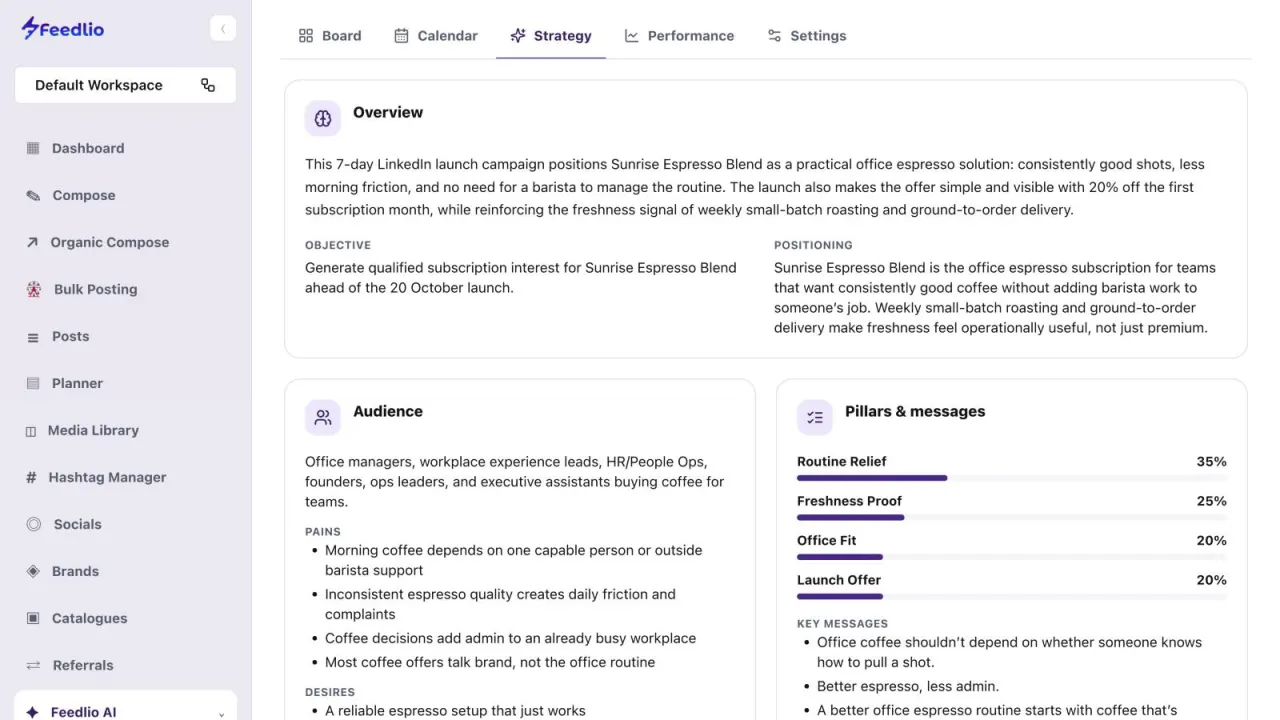
Review the strategy

Open the Strategy tab to see the AI's plan: an overview, the objective and positioning, the audience's pains and desires, and the Pillars & messages with each pillar's share of posts.

feedlio.io/campaign-builderClick to zoom
Screenshot: Review the strategy12
feedlio.io/campaign-builderClick to close
Screenshot: Review the strategy12
Step 8: Review the strategyEsc to close
STEP 9 of 9

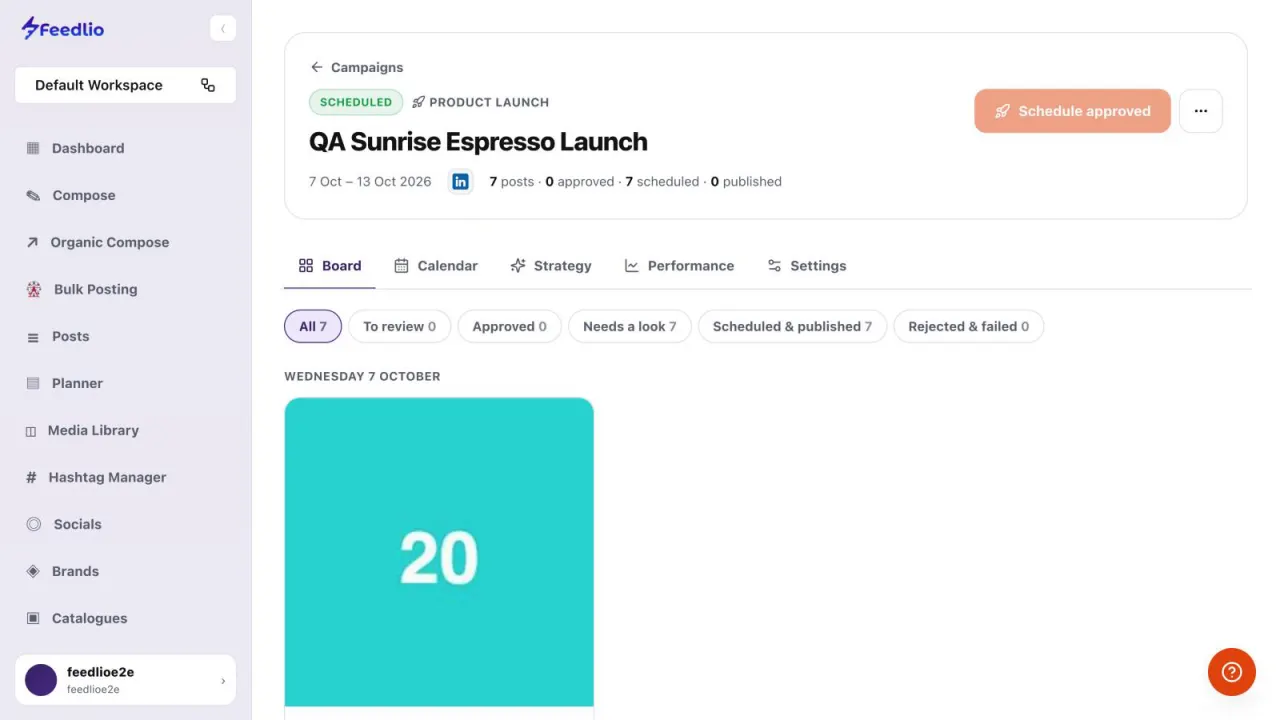
Approve on the board

On the Board tab, review every post and approve or reject it. Use the filters, such as To review and Approved, to work through them. Click Schedule approved to put the approved posts live. The Calendar, Performance and Settings tabs sit right next to the Board.

feedlio.io/campaign-builderClick to zoom
Screenshot: Approve on the board12
feedlio.io/campaign-builderClick to close
Screenshot: Approve on the board12
Step 9: Approve on the boardEsc to close
Recap

Campaign ready!

Pick a template or start new, write your brief, set goal, voice, images, channels and schedule, generate, then review the strategy and approve posts on the Board.

Next: Post Automation

Questions people ask

Do I lose my work if I leave the New campaign page?

No. The campaign form saves automatically as you go, so you can come back to the draft later from Your campaigns.

Can I check the plan before the AI writes any posts?

Yes. Under How the AI works, keep Review the strategy before posts are written turned on. You then see the strategy before any post is written.

How many tones can I pick?

Up to four. If you pick no formats, the AI mixes formats for you.

Which time zone do posting windows use?

Your workspace time zone. Posts are spread evenly inside the windows you set.

Can the campaign write from my brand's knowledge?

Yes. In Voice & style, pick a brand instead of No brand. The AI then writes from that brand's knowledge base and profile.

Video transcript

Read the full narration

0:00The AI Campaign Builder turns one idea into a complete campaign. The AI researches, builds a strategy, writes every post and creates the images, and you stay in control at every step.

0:12Open Feedlio AI, then Campaign Builder. The counters show live campaigns, ones being generated, ones ready to review, and posts planned. Click New campaign to begin.

0:24Or start from a template, like a product launch, an event, a seasonal sale, or a catalogue showcase. Each one pre-fills the goal, formats and brief for you.

0:35Below, filter your campaigns by draft, in progress, ready, scheduled, completed or archived, and search by name.

0:45In a new campaign, choose the campaign type and write your brief. The more specific you are about the product, audience, offer and dates, the sharper every post will be. Everything saves automatically.

0:57Attach a brand so the AI writes from its knowledge base, pick up to four tones, a brand voice and language, and the post formats you like, such as storytelling, how-to, or polls.

1:10Select the social accounts, the start and end dates, how often to post, and the time windows posts can go out in. You can even skip weekends.

1:20The summary keeps track of posts, images and credits. When you're ready, click Generate campaign. You'll review the strategy before any post is written.

1:31The Strategy tab shows the AI's plan: the objective, positioning, audience pains and desires, and the content pillars with their share of posts.

1:41On the Board, review every post, filter by status, and approve or reject them. Then click Schedule approved to put the campaign live. Calendar, Performance and Settings tabs are right next to it.

1:53Recap: pick a template or start new, write your brief, set goal, voice, images, channels and schedule, generate, then review the strategy and approve posts on the board.

2:06One idea became a whole campaign. Next, let's put your posting on autopilot with Auto Schedule.

Related guides