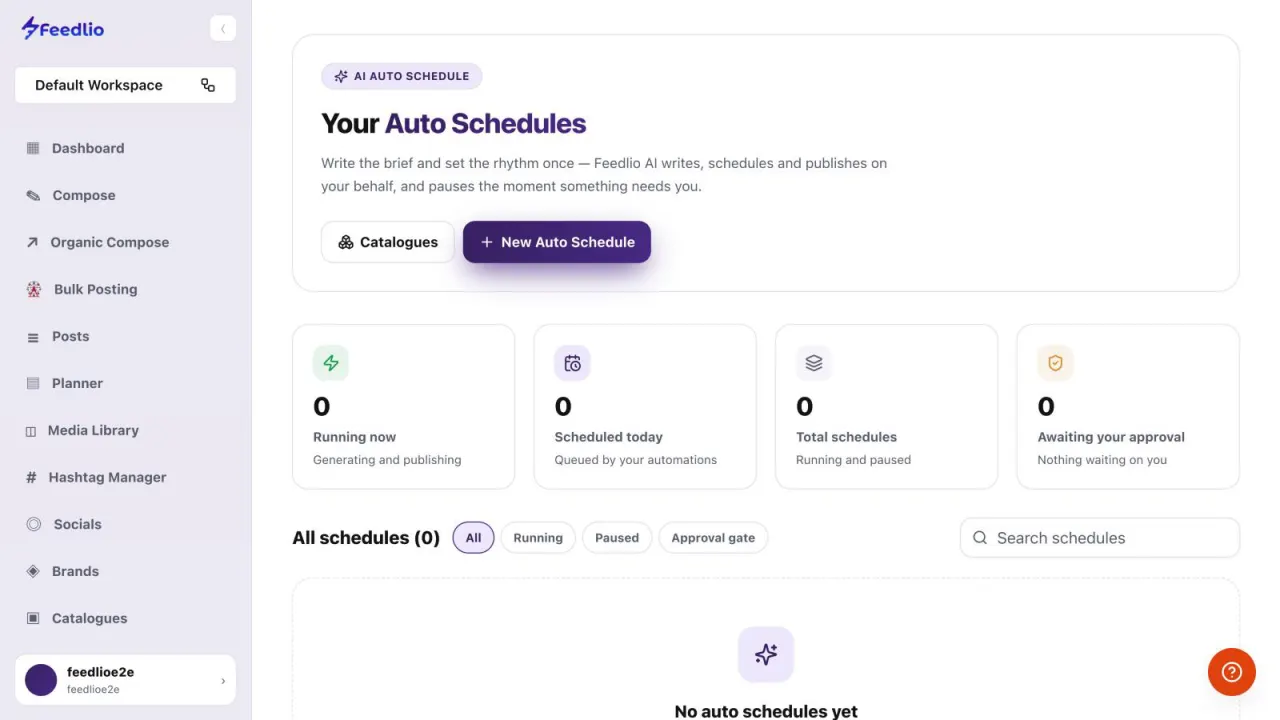
Your Auto Schedules
Open Feedlio AI → Post Automation. The counters show schedules Running now, posts Scheduled today, Total schedules, and posts Awaiting your approval. Click New Auto Schedule to create one.
12Set up an Auto Schedule that writes and publishes posts for you. Write the brief once, choose the topics, timing, images and accounts, then activate it with or without your approval on each post.
Video coming soonFollow along in the app. Tick each step off as you go.
Open Feedlio AI → Post Automation. The counters show schedules Running now, posts Scheduled today, Total schedules, and posts Awaiting your approval. Click New Auto Schedule to create one.
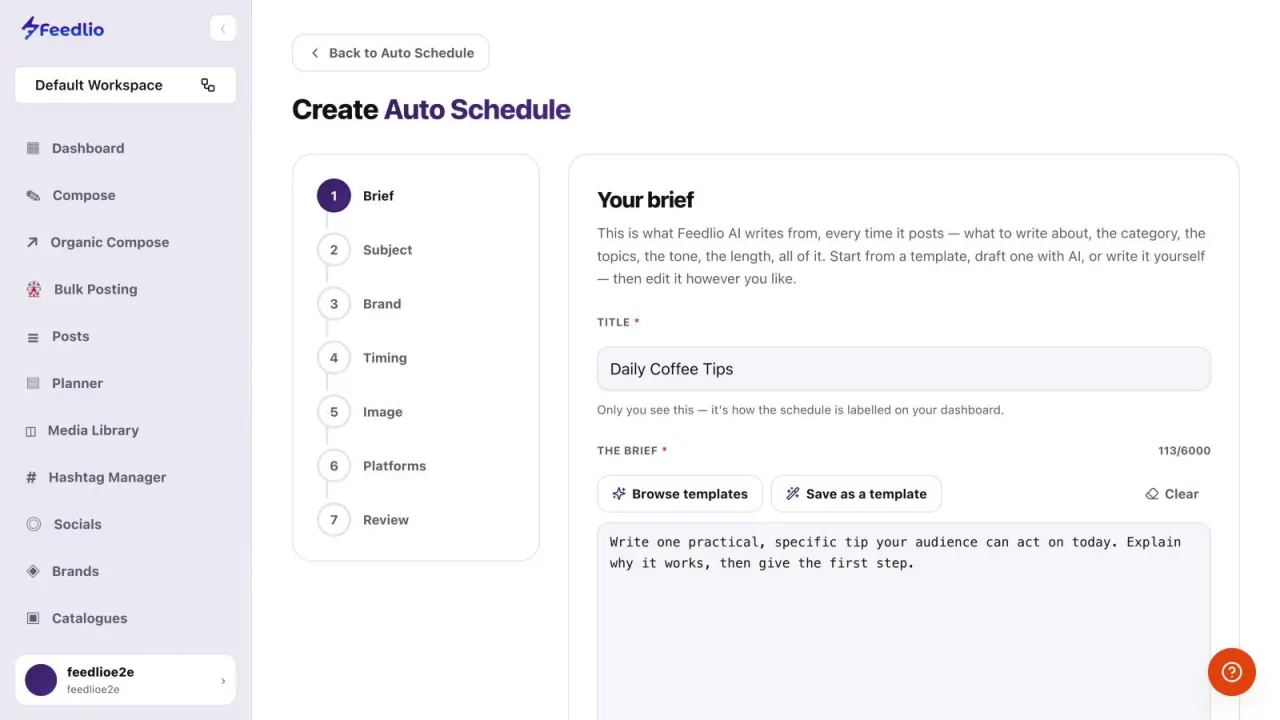
12Give the schedule a Title. Only you see it, as its label on your dashboard. Then write The brief: the instructions Feedlio AI follows every time it posts. Click Browse templates to start from a template, have AI draft one, or write your own.
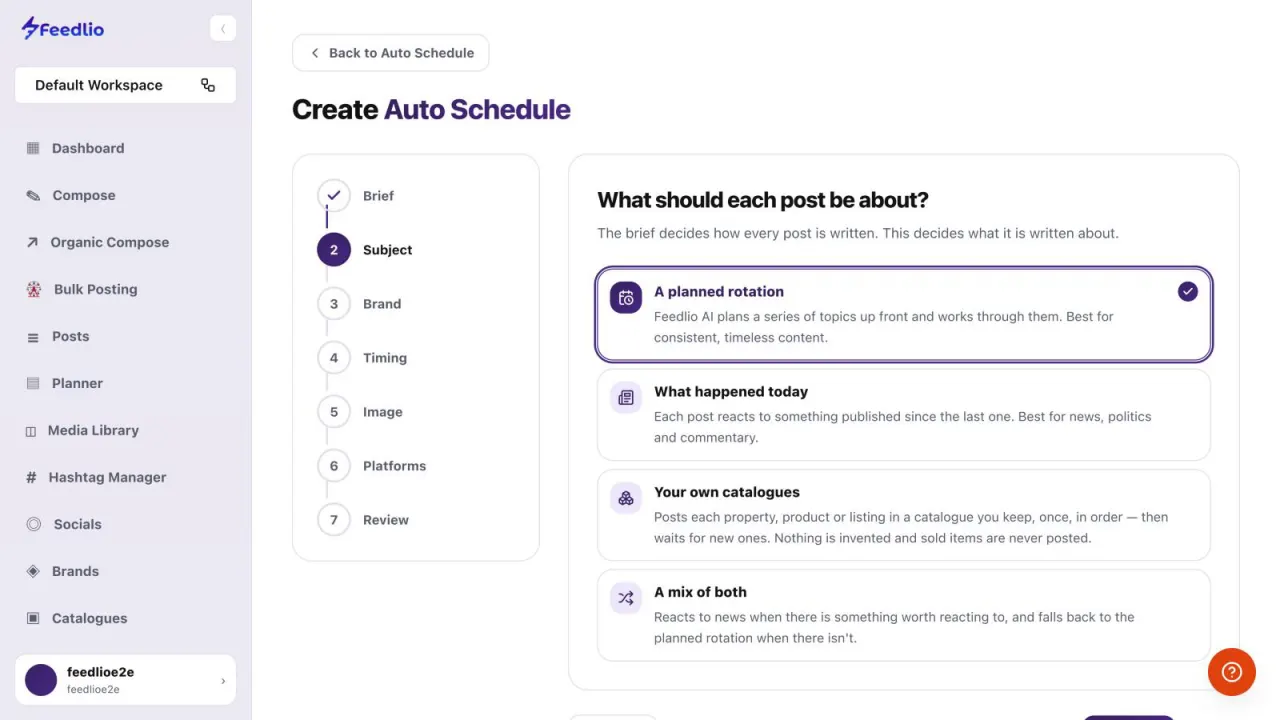
12Choose what each post is about. A planned rotation works through topics planned up front, What happened today reacts to recent news, Your own catalogues posts your items, and A mix of both combines news with the rotation.
Your own catalogues posts each item once, in order, and never posts sold items. Set up a catalogue first.

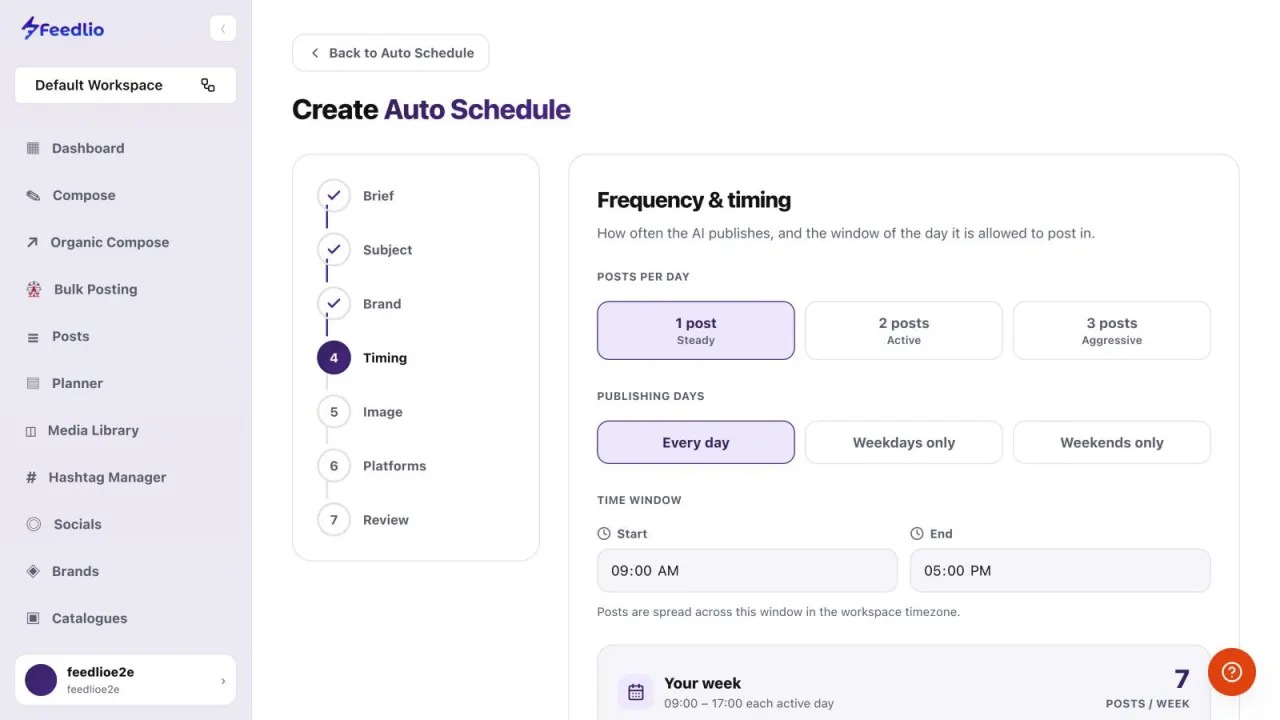
In Brand, optionally bind a brand so posts use its voice and knowledge base. In Timing, set Posts per day, Publishing days and the Time window. Your week previews the result.
Posts are spread across the time window you set.
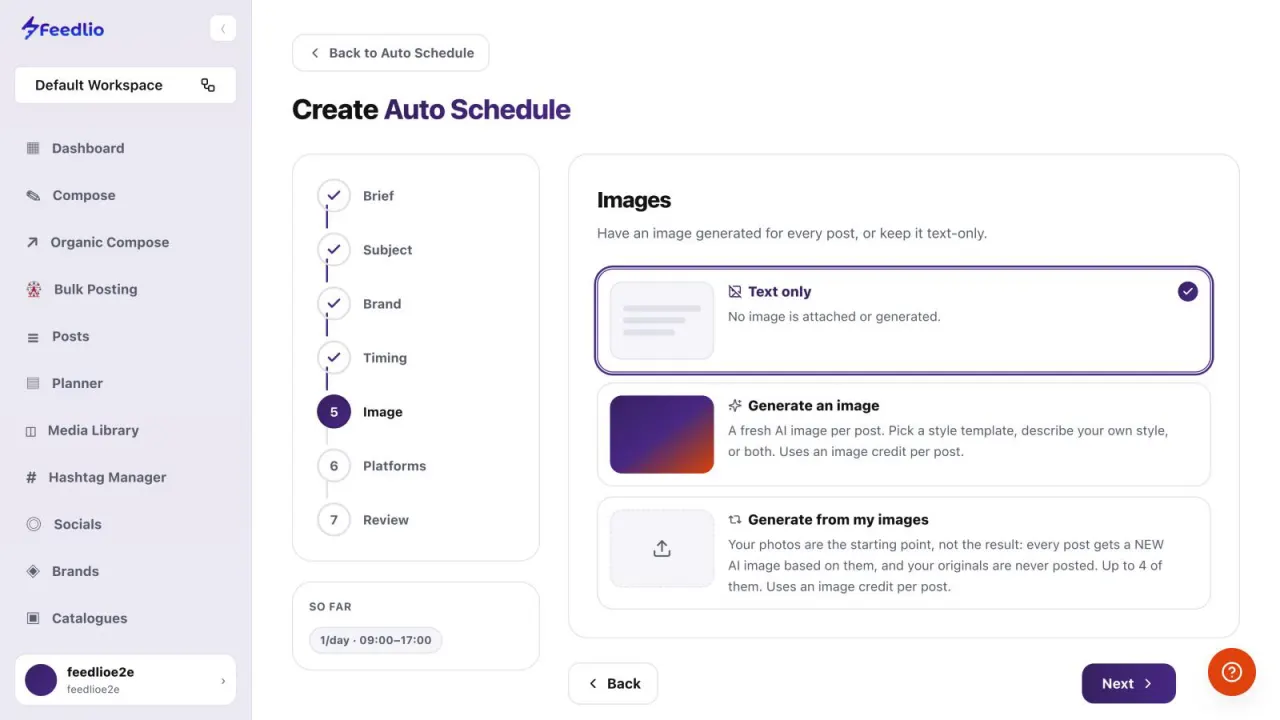
123Pick Text only, Generate an image for a fresh AI image per post, or Generate from my images to base new AI images on up to four of your photos.

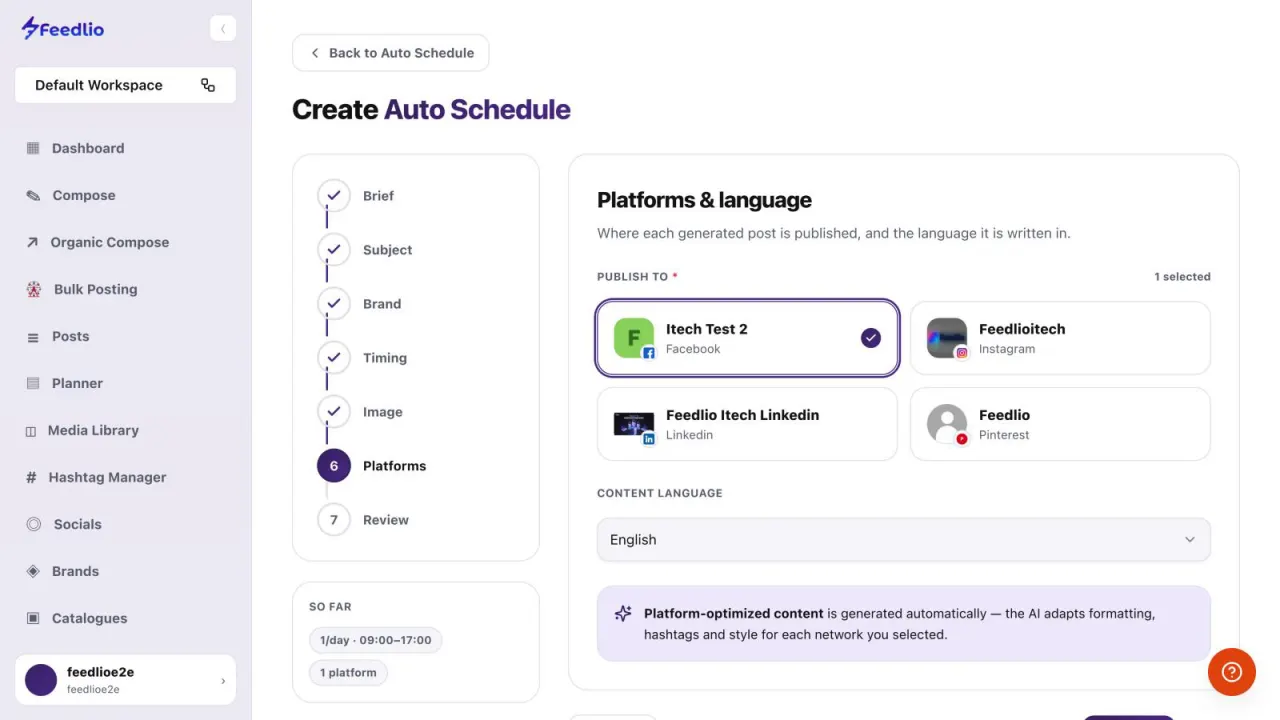
Under Publish to, select the accounts to post on, then choose the Content language. The AI adapts formatting, hashtags and style for each network you select.
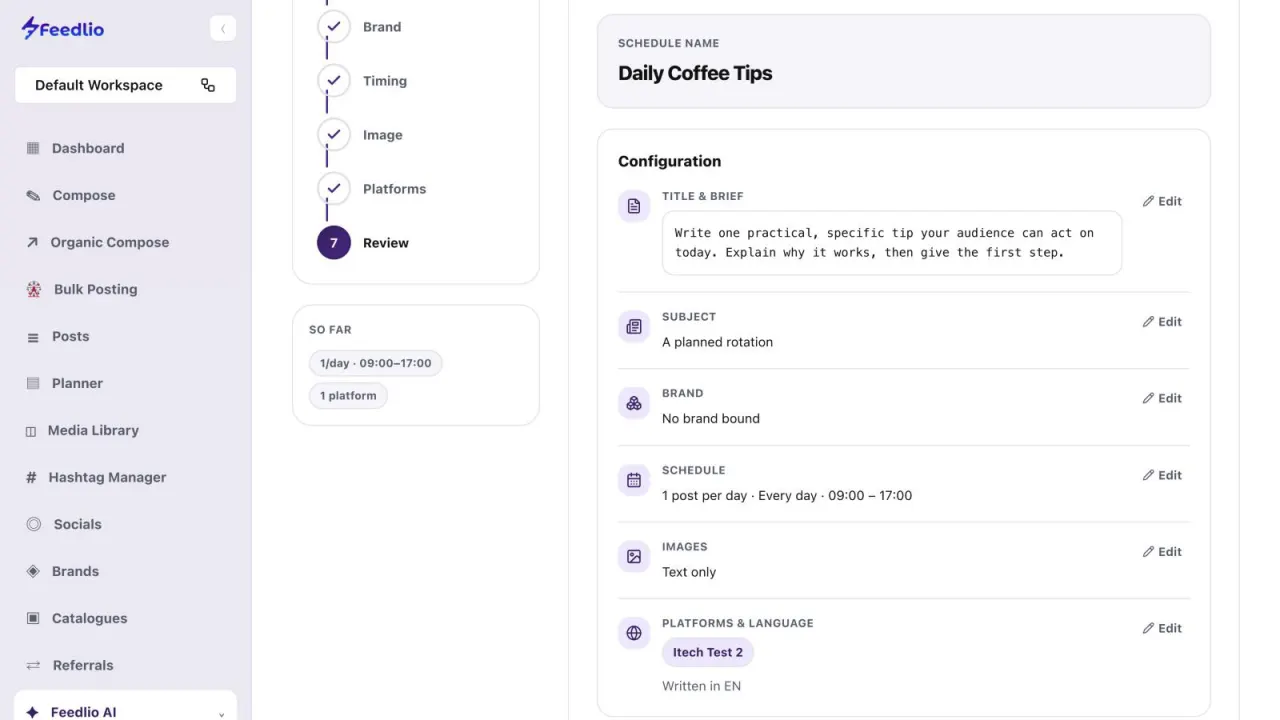
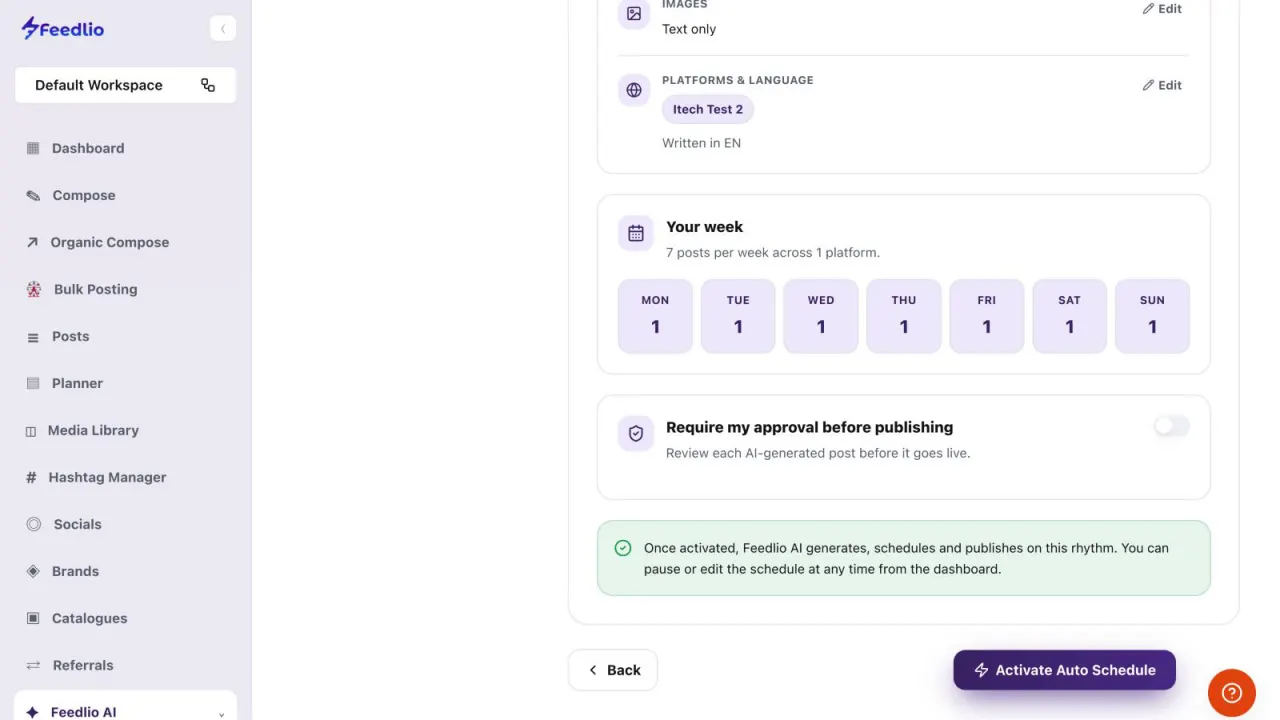
12Check the full Configuration. Click Edit next to any section to change it without stepping back through the wizard.

Turn on Require my approval before publishing to review each AI-generated post before it goes live. Then click Activate Auto Schedule. You can pause or edit it any time from the dashboard.
Approval is off unless you turn it on. With it off, posts publish to your accounts without review.
12Write a brief, choose the subject, bind a brand, set frequency and time window, pick images and platforms, then review and activate.
Only if Require my approval before publishing is off. Turn it on in the Review step to check each AI-generated post before it goes live.
Only you. It is the label the schedule shows on your Auto Schedule dashboard.
Your workspace time zone. Posts are spread across the window you set.
Generate an image and Generate from my images each use one image credit per post. Text only uses none.
No. Up to four of your photos are used as a starting point, and every post gets a new AI image. Your originals are never posted.
0:00Auto Schedule puts your social media on autopilot. Write a brief and set a rhythm once, and Feedlio AI writes, schedules and publishes on your behalf, pausing whenever something needs you.
0:12Open Feedlio AI, then Post Automation. The counters show schedules running now, posts queued today, total schedules, and anything waiting for your approval. Click New Auto Schedule to create one.
0:26Step one is the brief. Give the schedule a title only you will see, then describe how every post should be written. Start from a template, let AI draft it, or write your own.
0:37Next, decide what each post is about: a planned rotation of topics, a reaction to today's news, items from your own catalogues, or a mix of news and rotation.
0:48Optionally bind a brand so posts use its voice and knowledge base. Then set how many posts per day, which days to publish, and the time window posts can go out in. The weekly preview shows the result.
1:02Choose text-only posts, a fresh AI image for every post, or new AI images based on up to four of your own photos.
1:10Select the accounts to publish to, and the content language. Feedlio automatically adapts formatting and hashtags for each network.
1:19Finally, review the whole configuration. Click Edit on any section to change it without going back.
1:26Turn on Require my approval if you want to check each AI post before it's published. Then click Activate Auto Schedule. You can pause or edit it any time from the dashboard.
1:37Recap: write a brief, choose the subject source, bind a brand, set frequency and time window, pick images and platforms, then review and activate.
1:48Your channels now stay active on their own. Next, let's feed Auto Schedule your real products with Catalogues.